
If you are coming to this post from the initial post in this little series, you have an idea of the equipment you need to get a shot at some stellar pics … literally. In this second installment on getting good shots of the Milky Way, we will look at some camera settings to make the magic happen.
TL;DR: 12mm, f/2, ~3,200 ISO, crop sensor = success (maybe … )
Caveat Alert!
The internet is full of people who are willing to absolutely crucify you over the excruciating minutia of things like camera settings and the “right” way to do things. What follows is not some holy text. These are simply some useful guidelines to get you in the right neighborhood, and probably even into the ballpark, to get some amazing shots. Depending on your camera, lenses and even where on the earth you are shooting, some assembly will be required.
As in daylight photography, getting the proper exposure is all about that good-ol’ exposure triangle. Shutter speed, ISO and aperture. It is as simple, and as complex as that. Just like in other kinds of photography, picking your ideal settings will depend on the abilities of your camera and lenses, and what other gear you have brought into the field.
Shutter Speed.
Of the three main camera settings, this is the one that takes the most math. Thankfully there isn’t much of it.
Simply put, if a light source moves during a long exposure shot, you get a trail, not a dot. This happens whether the camera moves (If you have ever accidentally taken a very long exposure on a dark street with lamps, you know this effect) or if the light source is moving. Due to the rotation of the earth, long exposures mean stars appear to be moving, and if your shutter is open too long, the bright points in the night become little tic-tacs, giving your image a blurry, unfocused quality. Leave the shutter open long enough and you get star trails, which are very cool, but another sort of image entirely.
To keep your stars as little points of light, you need to abide by a guideline known as the 500 rule. In full frame terms, the 500 rule is simply 500 ÷ focal length of your lens. So, a 20mm lens (500/20 = 25) on a full frame body would leave you with 25 seconds as your maximum recommended shutter speed before your stars get visibly blurry.
Crop sensor camera users have two ways of adjusting this to suit our needs. Either, use what is called the “600 Rule” or simply use the 500 Rule but calculate against the equivalent focal length of your lens in FF terms. Some of us know these numbers by heart for the main prime focal lengths, others have found less nerdy uses for their neurons. In any case, these two methods should get you to generally the same number.
Now, there is a little asterisk on this one. Depending on where in the sky you are shooting, the same shutter speed will produce different results. Sound confusing? Think of it this way; stars that appear above the poles seem to move shorter distances in the course of a night. Stars that appear above the equator seem to move farther during the same time period. As a result, you can cheat a little with shots that aren’t taken pointing straight at the equator. It also means that in extreme wide-angle shots, the side of the frame closest to the equator will show star streaks first. Keep this in mind if you are trying to push your shutter speed just a little to eek a little more light out of a shot.
ISO
While shutter speed is determined by some very unalterable physics about the rotation of the earth, ISO is limited by the depth of your pocket book. There is no way around it … for the most part, nicer cameras can give you nicer images at higher ISOs.
The main limitation here is the level at which your particular camera leaves too much noise in the image to create an image you like after all is said and done in post-processing. Lightroom and Photoshop plugins like Topaz DeNoise can only do so much, and if you push an image too far in the ISO department, there is no way to get it back. Again, there are no hard and fast rules here, and the best way to find the limits of your camera, and your editing skill, is to just get out there and shoot.
The only variant here that is not directly related to the camera you purchase is the temperature of the sensor while you are shooting. All digital sensors heat up while you are using them, and that heat causes black body radiation that can be picked up by a confused sensor thinking the heat is actually light. This effect, and the math camera makers try to use to tame it is something that contributes to the noise floor of the camera, or baseline amount of noise that will appear in an image.
If that last paragraph made your eyes cross, just remember this. Cold cameras shoot cleaner images (as long as they aren't frozen solid). If you can keep your sensor cool, you are going to get better looking images. Most nights I have been out shooting the stars have been very, very cold affairs, and while freezing my fingers to the bone is never fun, the images that result from these shoots have sometimes been amazing.
Aperture
At last we come to the setting in astrophotography you have some control over … aperture. I say “control” but, as with the camera, this is more about your wallet than anything else. You can buy a better game here, as the quality of the glass you are using will be put to a pretty severe test shooting the stars.
I am not one to put too much stock into sharpness tests and lens benchmarking anymore, but shooting astrophotography is basically a real-world version of your lens’s worst nightmare. You will most likely be shooting at or close to the maximum aperture your lens can manage, which means any fringing, manufacturing defects, coma … basically anything that would keep a tiny white speck from being a tiny white speck will become blatantly obvious.
For current camera sensors, I find that any lens that does not go wider than roughly f/2.8 on a crop sensor isn’t of much use. You can use these slower lenses if they are extremely wide, but you will still be getting a very dim image that you will have to push hard in post. This need for a very wide aperture wide-angle lens is what led me toward manual prime lenses. The exception here are cameras like some of the Sony a7 range that can manage mind-bogglingly high ISO levels with surprisingly little noise.
Cheaper manual prime lenses, such as those from Rokinon and Laowa are excellent candidates for shooting the night sky. These simple, tried-and-true lens designs can produce crisp images, and their extra wide apertures reaching down as low as f/2 depending on the focal length can allow you the leeway to balance your ISO and shutter speed to keep out of the danger zones of noisy images or stubby, unintended star trails.
The Final Word
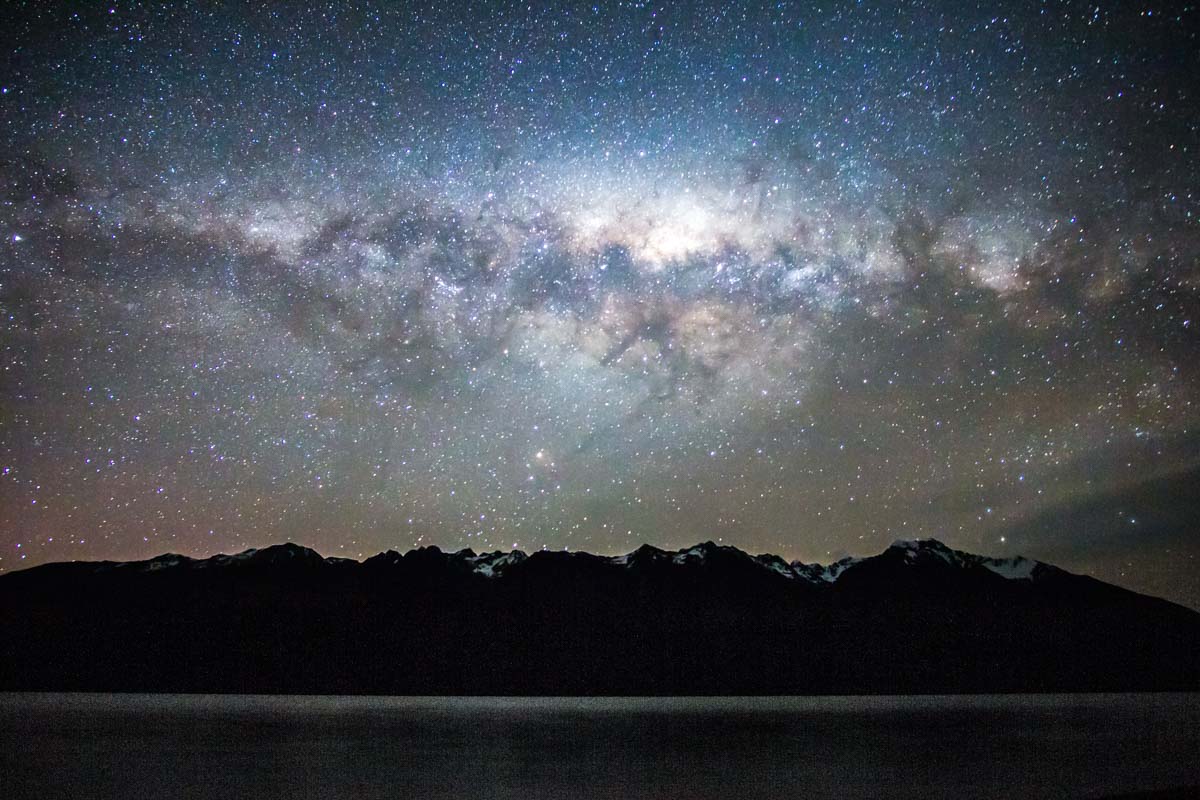
Your settings, and your milage, may vary from here, but this should give you a general idea of what to consider when shooting the Milky Way. Typically, my shots are under 13-15 seconds (8 seconds or less on 35mm), and I keep my ISO below 3,200 on my Fuji camera bodies. Nearly all of my night shots are taken with a Rokinon 12mm f/2, or a Mitakon 35mm f/0.95 if I am tiling images together afterward. There are always exceptions depending on ambient temperature, how clear the sky is, and the such influences, but these are the settings I start from to get the final effect I am looking for.
But, what happens after you get your first few successful shots of the Milky Way? Well, if you are like me and any other photographer I know, you are going to get bored and want to start adding some visual interest to the frame. In the next post in this series, I will cover a couple of quick tips to add a little spice to your marvelous new Milky Way shots.